Integrating OUD and EUS: OUD as Proxy
EUS can be enabled for an OUD proxy server during installation or can be configured later if a proxy instance is already existing. In this post, I will cover steps on how to create a new OUD proxy instance for EUS using a GUI and Active Directory as the backend.
Assumptions:
- OUD base product binaries are already installed and a Web Logic domain (optionally) has been configured for ODSM.
- The Active Directory has user identities to which the OUD will act as proxy.
- An OUD proxy instance will be now created.
Configuring EUS for an OUD proxy server
Change to OUD_install_dir directory. For example:
cd /opt/app/mw/Oracle_OUD/
Ensure JAVA_HOME environment variable is set to a supported JVM.
export JAVA_HOME=/opt/app/jdk
Set INSTANCE_NAME environment variable.
export INSTANCE_NAME=oud-proxy
Run the oud-proxy-setup command to configure the proxy server installation.
./oud-proxy-setup
The utility launches the graphical installer.
- On the Welcome panel, click Next.
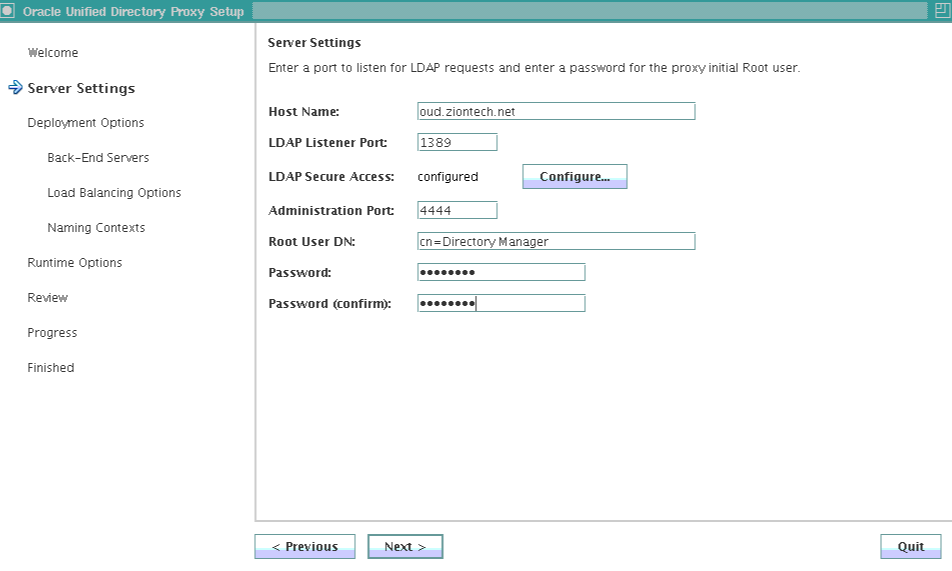
- On the Server Settings panel, enter the proxy server’s host name or IP address, LDAP Port, Password for Root DN.
- Configure the SSL Port by clicking Configure. Click Next to continue.
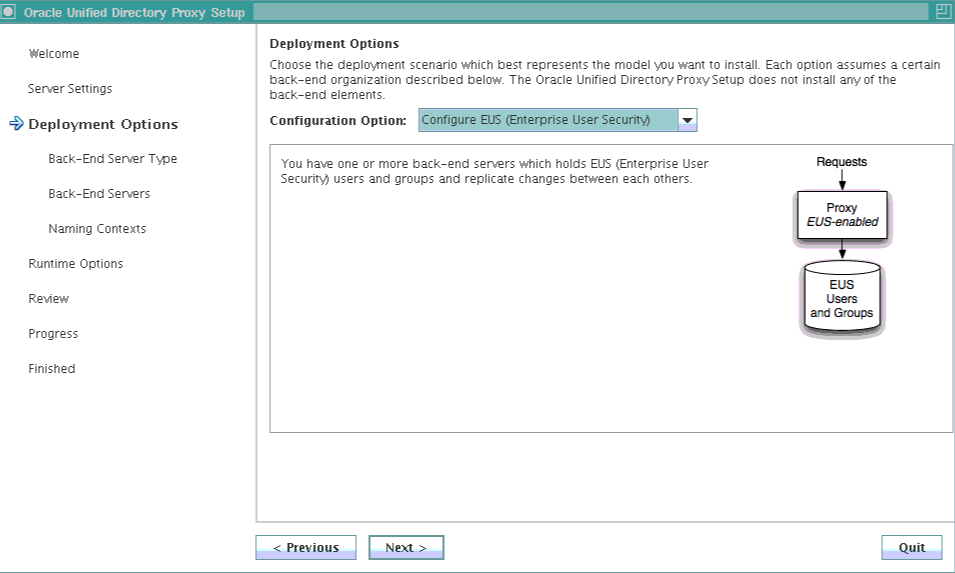
- In the Deployment Options panel, select Configure EUS from the Configuration Option drop-down menu.Click Next to continue.
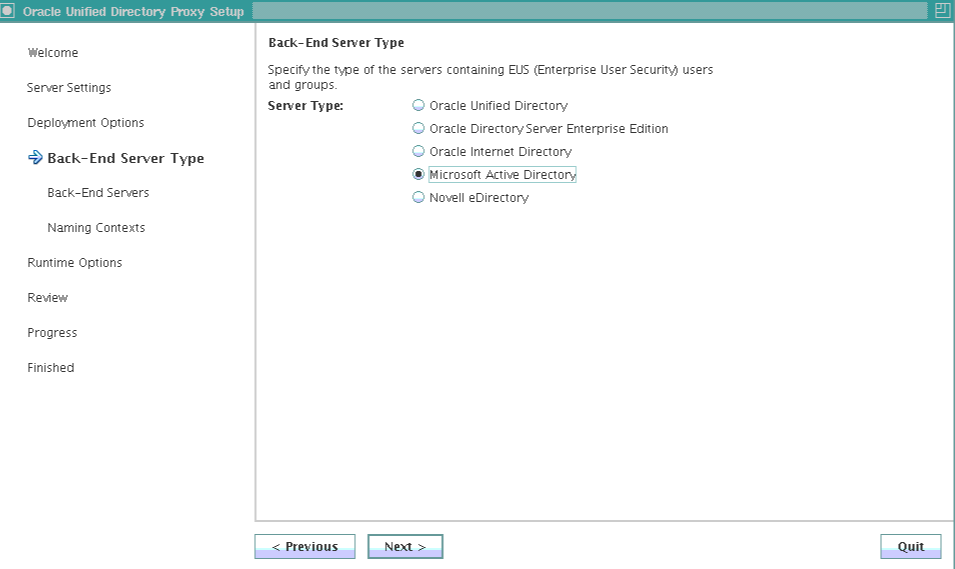
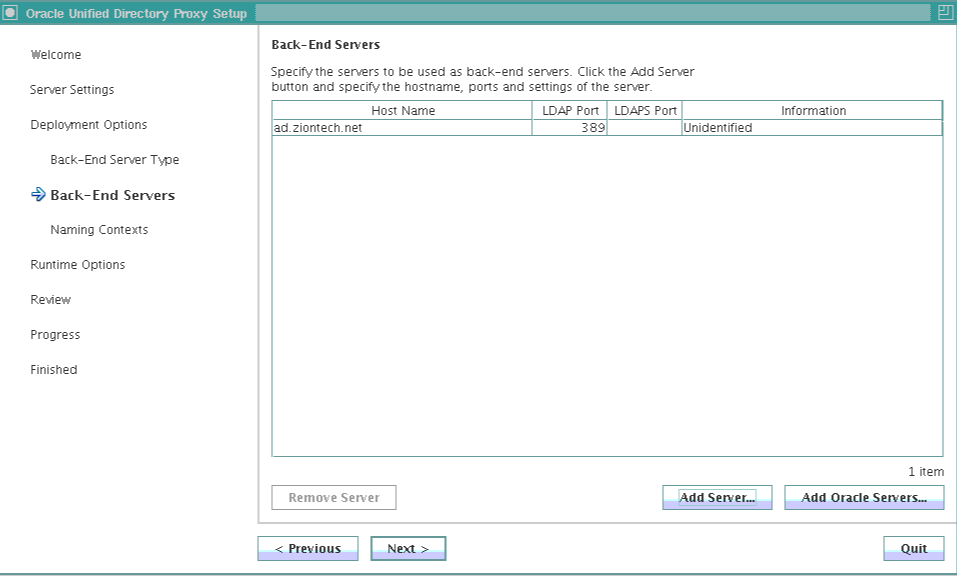
- Select the backend LDAP server type. In my case, it is Active Directory. Click Next.
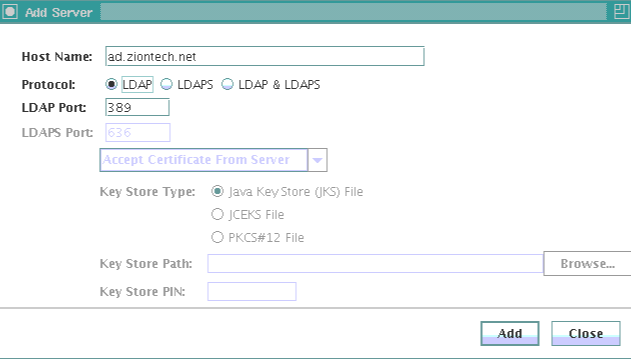
- Click Add Server and provide Active Directory details.
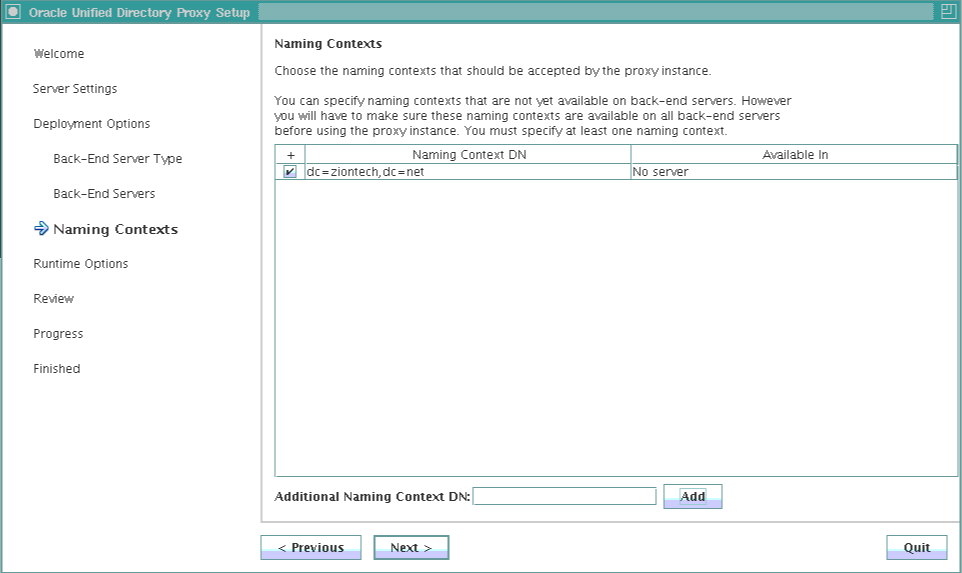
- Enter the naming context.
- On the Runtime options panel, click Change to configure any specific JVM settings, or click Next to run the server with the default JVM settings.
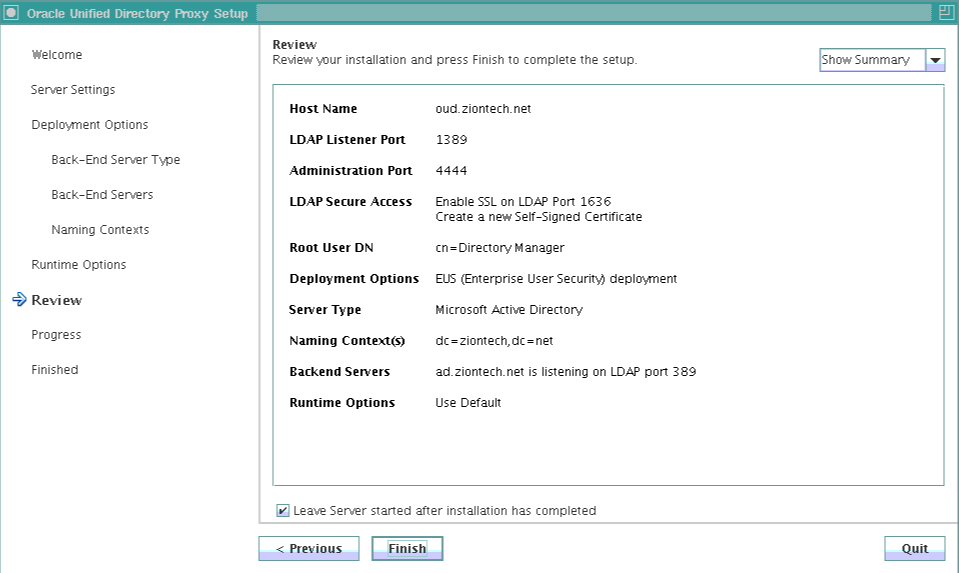
- Review the installation configuration.
- Click Finish to complete the installation.
Screenshots for reference:


Configure the EUS content:
- Once proxy instance is created, we must configure the EUS context for each EUS suffix defined.
- Take a backup of the eusData.ldif file located at $OUD_install_dir/config/EUS/.
- Create a file /tmp/password.txt which contains the password of the Root User DN of the OUD.
- Now edit the eusData.ldif file to replace every occurrence of dc=example and dc=com by the DN of the EUS suffix, and occurrence of cn=orcladmin by the Root User DN.
Then, import the content of the files by running the following command
$OUD_INSTANCE_ROOT/OUD/bin/import-ldif -n oraclecontext -l eusData.ldif -F --hostname localhost --port 4444 --bindDN "cn=directory manager" --bindPasswordFile /tmp/password.txt
- Now, login to ODSM and navigate to Data Browser.
- We must see user identities from an Active Directory through the OUD.
This completes preparing the OUD proxy for EUS. The next steps are to prepare the database and create user mappings.
Leave A Comment